How to Install Softwood/ Hardwood, Driveway Gates:

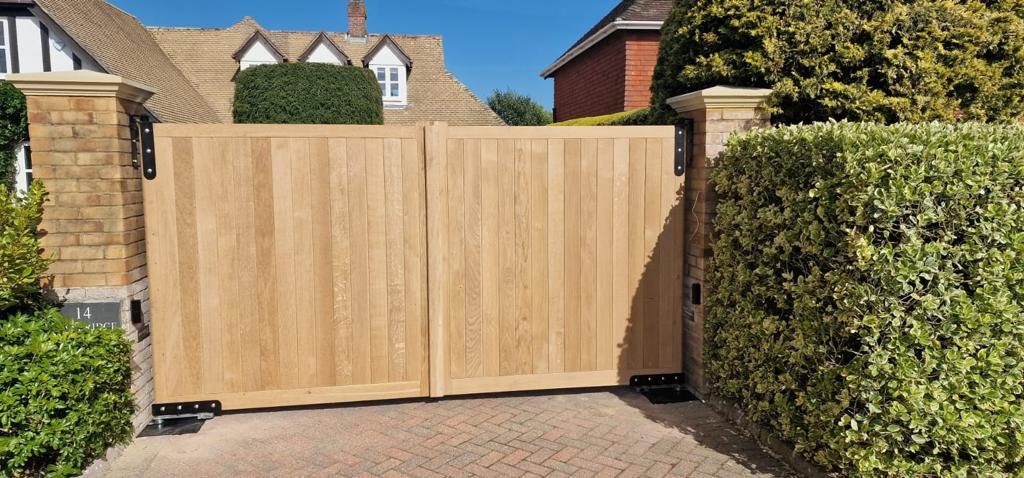
Adding a driveway gate enhances the security and style of your home. It restricts uninvited visitors from accessing your property effortlessly. Gates can be operated manually or electronically, based on your preference. When accompanied by a fence, it provides a safe and enclosed space for children and pets. This manual is only for manual gate installation. For electric gate installation, always employ the services of a professional. Contact us at 01420 487700 for assistance.

The wooden driveway gate must be protected with suitable outdoor paint or stain and treatment. If you need to do this, check out our “How to Paint or Stain a Gate” guide. This guide will take you through the process of fitting the driveway gate to existing posts or pillars. Before proceeding, if you need to install new posts, go through our “How to Fit Gate Posts” guide.

DRIVEWAY GATE BRACING

It is essential to comprehend the appearance of the gate from the back and the positioning of the gate’s furniture. The frame and the rear structural bracing determine the strength and durability of the driveway gate. Hanging the gate correctly is crucial. If your new gate has a structural brace style, hang it accordingly. (Depending on the design, some gates may have an upside-down “V” pattern on each leaf. In such cases, you can hang either side.)

With the hinges located at the back, this driveway gate opens inwards towards the property. If you need it to open out, place the hinges at the front of the gate. Please note that gates must not open onto highways or pedestrian paths. If you need it to open in that direction, ensure you have sufficient space to do so.

HOW TO FIT A DRIVEWAY GATE

First, ensure that you have the minimum clearance required for driveway gates to operate. The opening should be at least 40mm (1 1/2″) larger than the gate. The gap clearance should be 15mm per side (edge of post or pillar to edge of gate) and 10mm for the center to allow the gate to open. If you have more than 40mm, subtract the 10mm center measurement, divide by two, and obtain the gap for each side.

HINGES TO USE

We suggest and sell only adjustable hinges. They simplify gate installation and enable you to adjust the gate’s position as needed without removing it. If you purchased the hinges from us, you would have received four hinges (either 24″, 36″ or 48″, depending on the gate size).

FITTING THE GATE HINGES

Place the hinge on the horizontal structural brace (hinges to be placed on top and bottom). For aesthetics, centralize the hinge. Mark holes and remove the hinge. Drill pilot holes for the screws. On the hinge, there is a square opening. This is for the dome-headed bolt. To allow the “dome” part to be placed on the front, you must drill this bolt through the entire gate. Proceed with caution while doing this. Begin by drilling a pilot hole using a 3mm drill bit. Then enlarge the hole. To prevent the wood from splitting as you go through, drill halfway on each side following the guide hole set with the 3mm drill.

Connect the eye bolt to the hinge. One bolt and washer should go on either side of the hinge’s edge.

MARKING THE HINGE PLATES

Next, take the hinge plate, place it onto the eye bolt, determine the distance from the ground level to the bottom of the hinge plate and add the ground clearance gap (25mm to 50mm). Now mark on the post the position of the bottom of the hinge

INSTALL THE GATE

Using a second person, place the gate onto the hinge plates.

Once both sides are attached, modify the hinges by using the two bolts to align the height and sides. Each side should have an equal gap width with the center being 10mm. This process may take some time to achieve exact alignment. The gate should be able to swing open and close smoothly now.

INSTALL THE GATE HARDWARE

RING LATCH

The ring latch comes in five pieces, including a ring latch with a connected rectangle bar, ring latch, 2 x bar catches, and a stainless steel bar. If the gate opens inwards towards you, the ring latch with the rectangle bar should be placed on the rear of the gate. If the gate opens away from you, it should be fitted to the front of the gate.

Place the ring latch on the brace and allow the rectangle bar to protrude 50mm from the edge of the gate. Then, mark the holes, and remove and drill pilot holes. After this, there should be 4 holes. Use a ruler to draw a cross to locate the center of the area. This is where the stainless steel bar will connect to the ring latch on both sides. Carefully drill a pilot hole all the way through the gate. Measure the thickness of the stainless steel bar and select a drill bit larger than that to create a hole for the bar to turn freely. Screw the ring latch to the gate and place the bar in it.

Next, slide the holding catch over the rectangle bar, mark, remove, drill pilot holes, and fix it in place.

Go to the other side of the gate, connect the ring latch to the stainless steel bar, mark the holes, remove, drill pilot holes, then screw it in place.

Close the gate and position the catch on the other gate for the ring latch to close onto. Mark the holes, remove, drill pilot holes, and screw it to the post.

BRENTON BOLT

Choose the position for the bolt (usually best suited on top of the gate). Centralize it on the horizontal brace (for better appearance), mark the holes, remove, drill pilot holes, then fix it. For extra security, add a padlock.

DROP BOLTS

Drop bolts help secure the driveway gate in either an open or closed position. Each drop bolt needs to be fixed to the vertical edge opposite the hinge side (towards the center of both gates). Position it, mark the holes, remove, drill pilot holes, and secure it in place. With the gate in the closed position, release the drop bolt till it hits the floor. Mark the position by drawing a circle around the bolt. Open the gate to enable easier access.

Next, measure the diameter of the bolt and select a drill bit slightly larger. Set your drill to “hammer” mode. Drill a hole just past the depth required. Be careful with this procedure. It is worth checking that no services run underneath! When complete, check and repeat on the other side.

Now, fully open the gates to the required position. Repeat the above process so that the drop bolts will hold the gate securely in the open position.

That’s it!  Your driveway gate is now fully installed!